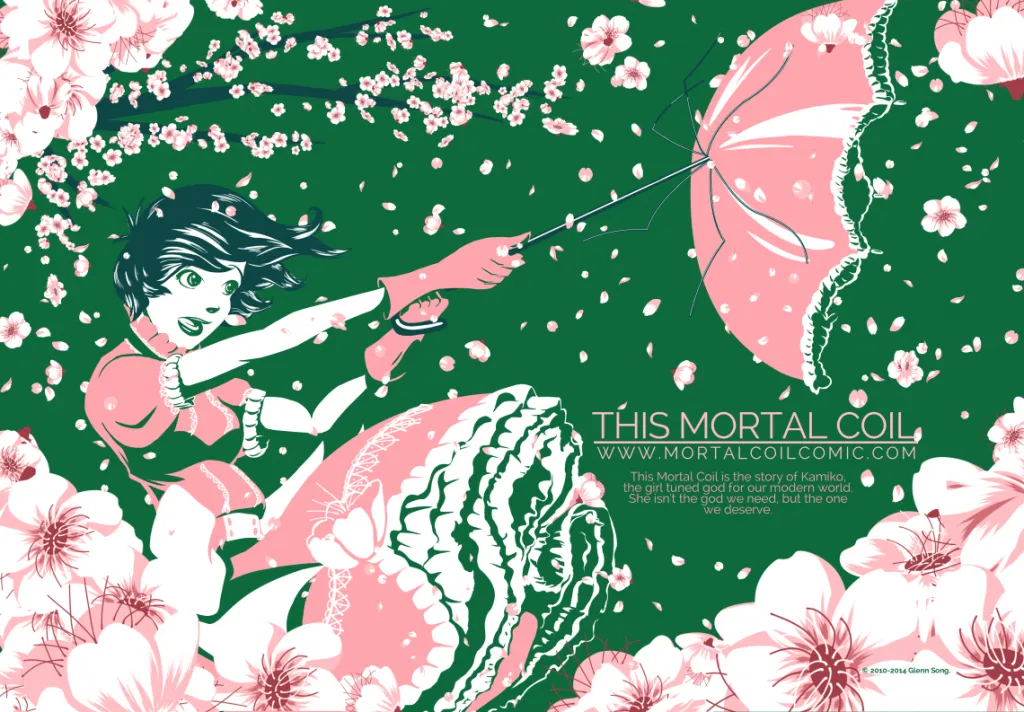
I’m going to show you how to make the sakura blossom/petal brush I used for my image “Sakura Storm.”
Before we begin: This is the first time I’ve done a tutorial or any kind of technical writing for a long time. If you are confused, please tell me in the comments and I can try and clarify the steps. It’ll help me improve for next time as well.
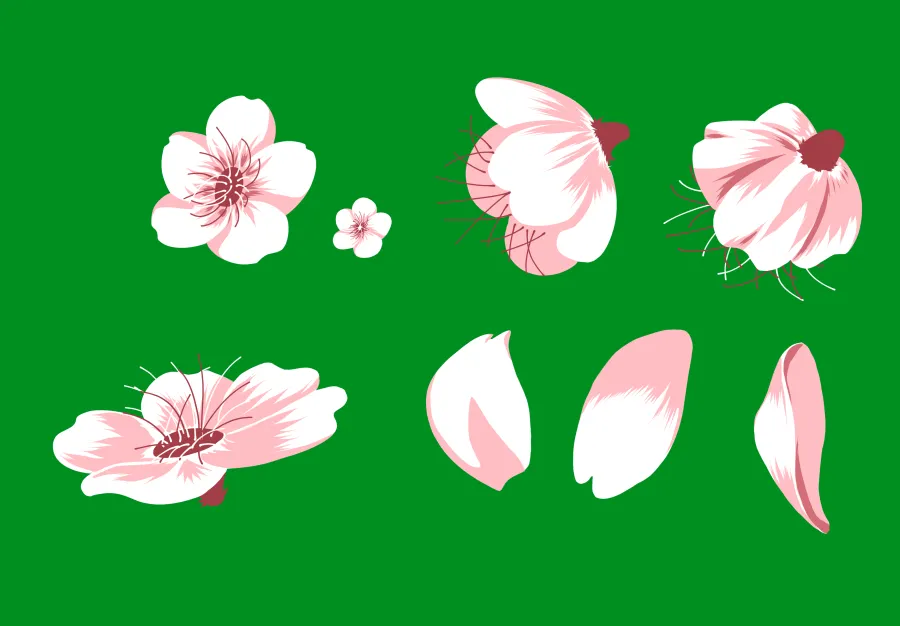
The first step was to create the artwork for the sakura blossoms. I went to google images and studied a bunch of cherry blossom images and I began to sketch them. I wanted to get the blossoms from different angles, because the brush ultimately just sprays them with varied size and angle. Sprayed artfully, they’ll appear as if the wind is blowing them along.
Some tips for the brush artwork: when making the original art, make the drawings bigger than you’ll need to avoid any kind of pixelation or blurring problems that you might encounter when it’s drawn by the custom brush. Also, when you make your artwork, make sure you do them on a separate layer with a transparent background. Below, the green background is on a separate layer. Each blossom is also on a separate layer so they can be easily isolated.
 ]
]
Making Materials
Now that you have your art, the next part is to make them into materials.
1. Cut out the blossom. You want to try and get as close as you can to the edges of the artwork. Using the rectangle select tool and trying to get as close as you can to the edges is one way. Another way is to use the magic wand. Select the transparent space around your artwork, so that it makes an inverse selection. Use the menu option Selection->Invert Selected Area and you’ll get a close selection of your artwork.
Note: If all of your brush art is on the same transparent layer, you’ll either want to separate them onto their own layers or after you magic-want-select the one you want, you can go through and deselect the other images.
2. With your blossom selected, go to the Edit menu and select “Register Image as Material.” You will see a dialog that looks like this:
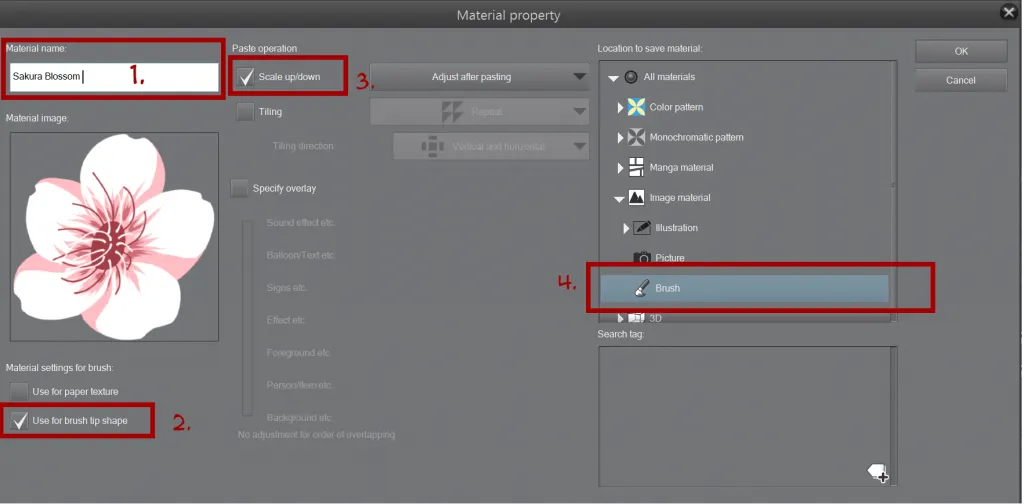
- Give your new Material a name.
- Check “Use for brush tip shape” which will let you use your artwork as, well, a brush shape.
- Check “scale up/down” which should be the option to allow your artwork resize as you draw strokes with your brush
- Save this new material under the brush subfolder.
- (Optional) Give your material tags that you can use to search later.
- Make materials out of the rest of your artwork.
Making the Brush
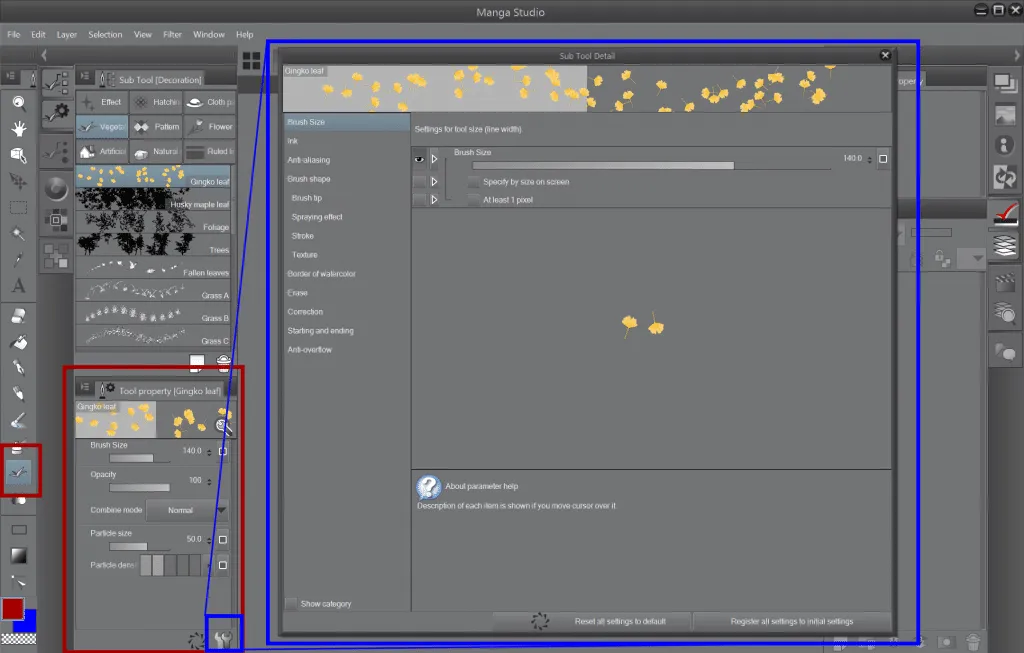
In the toolbar there’s a button that says “Decoration” — please see the red box on the image below. Select that and you should see a ton of available brushes that Manga Studio has built in. There are, in fact, spray brushes for vegetation and there are other brushes that work as a ribbon such as a lace brush or a musical measure brush.
This “Decoration” subtool is where you will add your new brush. Here’s how:
- Find a submenu (“Effect”, “Hatching”, etc) that’s appropriate for the brush you’re trying to make. I put the blossoms under “vegetation.”
- There are a few ways to make a new brush:
- From scratch: Right-click on any of the brushes and select “Create Custom Sub Tool.” Name it and press ‘ok’
- Duplicate an existing brush: right-click on any brush and and select “Duplicate sub-tool.” You’d want to dupe an existing brush if there’s one that acts close to what you want, and all you want to do is swap artwork.
- Open that new brush’s properties panel. Depending on how you setup your manga studio workspace you may see the properties in a different location than me. If you don’t see it at all, try going to “Window” in the menu bar and selecting the option “Tool Property” and you’ll see a new subwindow appear with brush settings.
- Once you get the submenu to appear, there’s a handy wrench on the bottom right hand corner of that submenu — see the image below and where the blue outline is. If you click on that you will get another large submenu that looks like the one in the blue square. These are the extensive properties used to customize your new brush. Yes, it’s daunting looking, but also really powerful.
Here’s the brush setup for the Sakura Blossom:
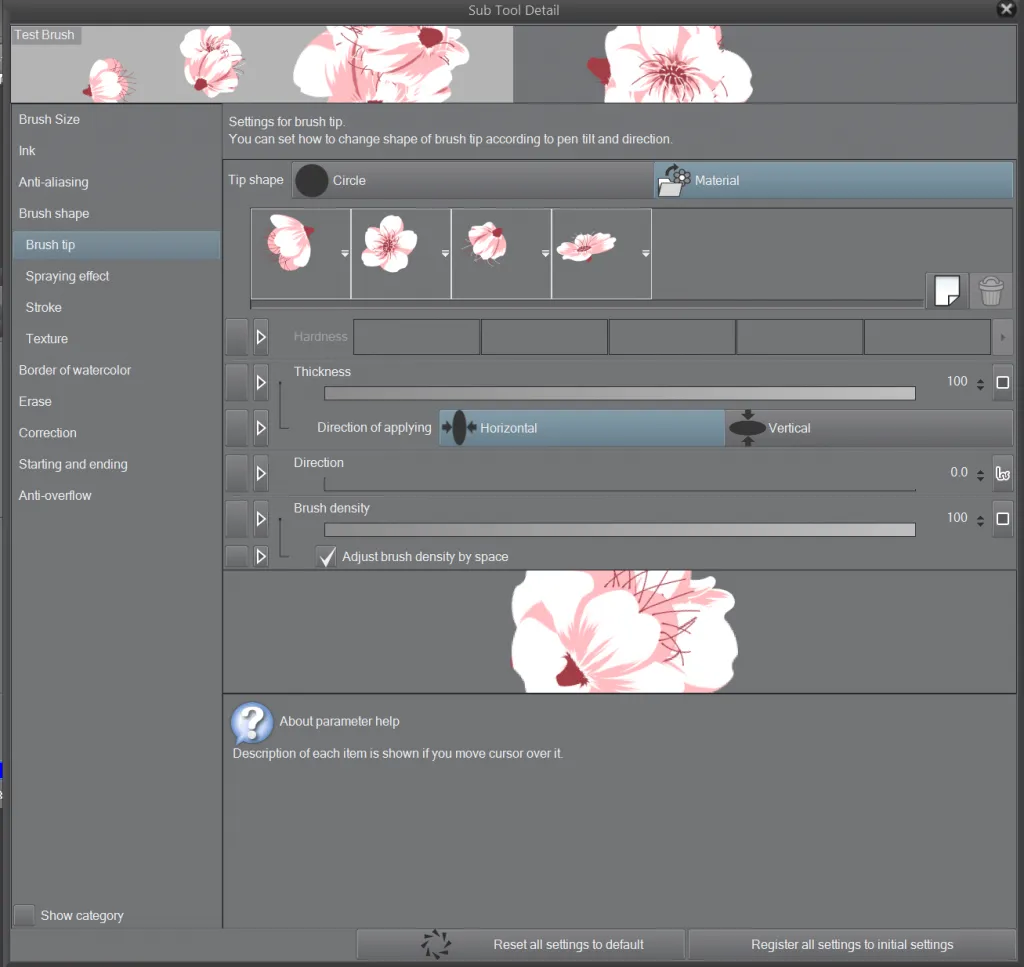
- In the brush editor, go to Brush Shape. These are templates for various basic brushes. For my purposes I picked “pen” since I don’t want any kind of fading or blending with the sakura blossoms. Pen also means I won’t be giving my pedals any mixed in color, but I’m fine with that since the artwork already defines the colors I want.
- Go to the Brush Tip menu next. Here you can add your brush materials. Under “tip shape” select material instead of circle. You’ll now have the ability to add your new brush materials. Click on the paper icon to bring up the material database that you added your artwork too. You can add as many materials as you want.
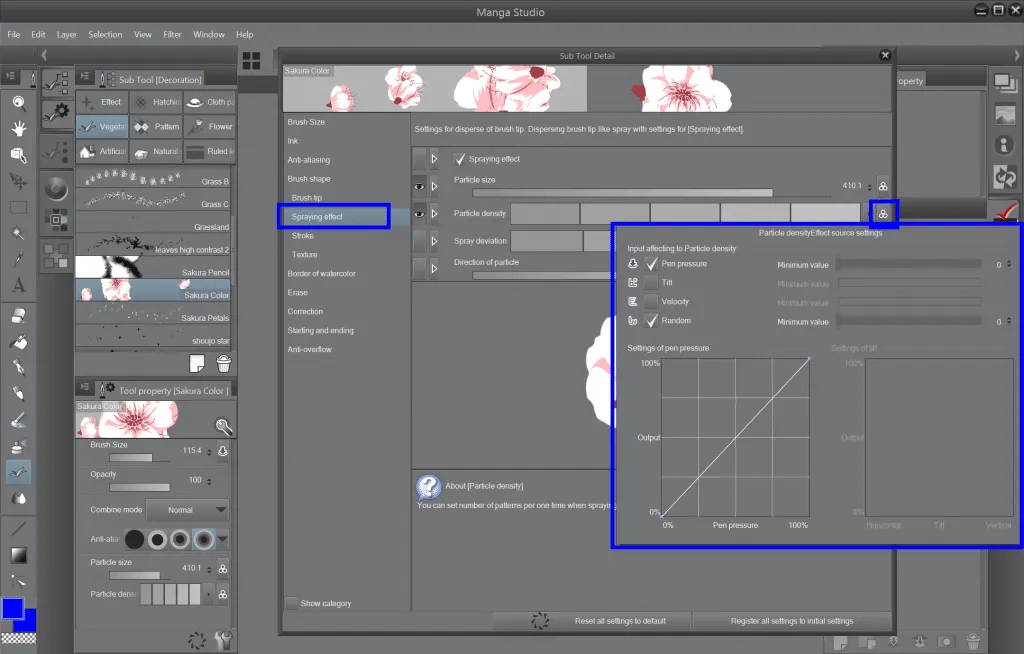
Afterwards, I went to “Spraying effect” and checked the “Spraying effect” checkbox. You now get access to a bunch of options that affect how your brush sprays onto the canvas. One of the things I set was “particle density” and “particle size.” To the right of “particle density” you’ll see a small button. Click it and you’ll be able to configure how you want the density of particles to be sprayed: by pen pressure, using stroke velocity, or just randomly. Yes, there are a ton of options. :)
Make a new canvas and try the brush out. It may not be entirely what you want, so you can always go back and mess with the individual options or experiment. That’s how I learned — by trial and error until I got something I liked.
Useful Notes on Brushes
Any paint brush you make can easily become an eraser. To make it an eraser, look for the Combine Mode dropdown options. You’ll find that under the brush’s property panel. It allows you to do a lot of different combine modes just like you could in Photoshop with layers, but the last option is “erase.” I find it useful, because I can take a foliage brush, set it to erase, and then cut away a color to create the illusion of tree leaves and shrubs.
Hide/Reveal Brush Properties. In the brush property panel, to the left of each option is a check box. If you click it, you’ll get an eye. This means that the property is now visible on the tool’s submenu making it easy to access. I usually set combine mode and anti-aliasing so I can easy reach those options and turn a new brush into an eraser or to change the aliasing mode depending on what I’m doing.
You can do much more with brushes, so this is just scratching the surface. I’ve played with making ribbon type brushes which are useful for things such as lace (which Kamiko has a lot of). Hopefully this guide will get you started exploring brushes and applying that power to your own artwork. I find them really useful for creating natural settings and I use brushes for tree tops, clumps of grass, and obviously, these Sakura Blossoms.
[Edit: 4/3/2015 - I went through this article and made it easier to read. Yikes, it was awful.]